
Have you ever considered to change the top of your bathroom vanity? Perhaps you weren’t happy with the shade or something more fashionable. After a little research, were shocked by the price? In particular, if you’ve got an unusual, custom-made length countertop, your cost is doubled. Personally I was astonished to find estimates of $1000 to make a custom vanity top with two sinks in our bathroom. Therefore, I decided to look for a less expensive alternative. Instead of replacing the top, I replaced the top of the bathroom vanity using diy epoxy resin. The price of the epoxy resin was less than $150.
What is an epoxy resin?
Epoxy resins are also known as polyepoxides. It is a category of polymers and prepolymers with epoxide groups. Epoxy resins are cross-linked (cross-linked) by themselves or by homopolymerization or catalytically. These co-reactants are usually described as curatives or hardeners, and the cross-linking process is often known as curing. Epoxy could be used in a wide range of applications, including metal coatings, use in electronics/electrical components/LEDs, high tension electrical insulators, paintbrush manufacturing, fiber-reinforced plastic materials, and adhesives for structural and other purposes.
Epoxy is a burgeoning trend among DIYers searching for affordable countertops or ways to upgrade their kitchen and bathroom style without spending a fortune. Applying a coating of this substance can revive or restore worn-out, old, or out of style countertops for kitchens, bathroom countertops as well as flooring.
You can’t purchase epoxy pre-fabricated slabs from a vendor and install it in your bathroom or kitchen. It’s actually a kind of refinishing item that you purchase as an epoxy countertop kit, which you then use it to finish an existing surface.
DIYers often apply epoxy to concrete, laminate, wood or even ceramic. The popularity of epoxy is due to its the durability as well as scratch-resistant. It is able to withstand the majority of the cleaning substances without losing its shine.
Design and colors of epoxy countertop
The effects can be extraordinary and distinctive by adding different colors , or making a mixture of the powder’s metallic components with alcohol before spreading it over epoxy. Any pattern, design, or color that you can think of is feasible. The colors can be added at the time of mix of the part A with part B, or following the time that epoxy is sprayed on the countertop.
Step 1 – Remove Backsplash
Prior to placing epoxy on any surfaces, it’s essential to cleanse and prepare the surface to ensure that epoxy can bond well and will not break later on. To get the best results, you should have the surface leveled horizontally. In the event that the area is sloped or vertical in one direction it will be a follower of gravity and flow slowly to the direction of the slope. It is still feasible to use epoxy to an vertically sloped surface, method of coloring differs from the one used on the horizontal surface.
My bathroom vanity was covered with an unfinished vertical backsplash which has been attached to the wall using an impervious sealant. The best option I had was take off the backsplash completely and then apply epoxy once it was in the horizontal position. Once the epoxy has fully cured, it’s extremely easy to stick it back onto the wall.
To take the backsplash off you need a knife and slice through the sealant. Usually, the sealant is placed to all sides of the backsplash to stop any water from leaking behind the sink. Make sure you cut the sealant in two places: the both sides of the drywall, and on at the bottom, between the backsplash and vanity. Use a screwdriver to gently remove it from the drywall. Be careful not to force onto the drywall with too much force in case you end up damaging the drywall, and can lead to additional work in fixing it.
Some vanities there come with a backsplash that’s not removable. This means that you need to be aware that epoxy can slide down when applied to the vertical surface. In this situation, the majority of the color designs is required to be created prior to using the epoxy. you can read more about kitchen and bathroom.
Many people wonder if they should consider whether the bathroom vanity requires an additional backsplash. You can decide to not install it all at once.
Step 2 – Remove Old Sink Faucets
Next step would be to take off the faucets. The removal of the faucets is easy. The first step is to switch off the cold and hot valves to supply the faucets with water. After that, unwind the leaky hose that connects to the faucets. Set up a bucket beneath the sink to capture any water that gets trapped in a pipe. Once the hose is taken out remove the locknuts, then take the faucet off the top of the vanity.
There are people who apply epoxy without taking off the faucets, however it’s more difficult to work around faucets, which results in a messy job. Our bathroom faucets were outdated and required replacement and I did not have a alternative.
Step 3 – Scrape Off Old Sealant and Buildup From Counter Top
When the faucet and backsplash are taken off, grab an ice-cube and run it over the countertop and scrape away any old sealant or buildup. Spray TSP cleaner (trisodium phosphate) over the counter and wipe it away with a towel. TSP cleaner is able to remove oils and grease off the countertop. If epoxy is used on an oily or greasy surface the epoxy will not be able to adhere properly and may eventually break in pieces. Be sure to perform the same process of cleaning the backsplash.
Step 4 : Sand the Vanity using 320 Grid Sandpaper
Once all the oil and grease is removed, make use of an orbital sander that has an 320 grid sand disc to sand the top of the vanity. Make sure you finish sanding the countertop after using TSP cleaner or else, you’ll spread the grease across the surface by using sandpaper. Sandpaper makes the countertop surface rougher and makes the bond stronger. The aim is to make the epoxy remain on the countertop for a lengthy period of time.
Step 5 – Cover Any Gaps Between the Wall and Vanity
The majority of walls are typically covered with an element of texture the wall. The texture of the wall makes it uneven, with low and high areas all over the wall. Because the countertop is set on the walls, there will be tiny gaps between the wall and countertop. If the gaps aren’t filled in, the epoxy will be able to run through these gaps that are behind the sink. To solve this issue make use of silicone sealant to fill in these gaps.
Some vanities come with more gaps. These likely won’t be sealed by the sealant. It is possible to apply bondo to fill in those gaps.
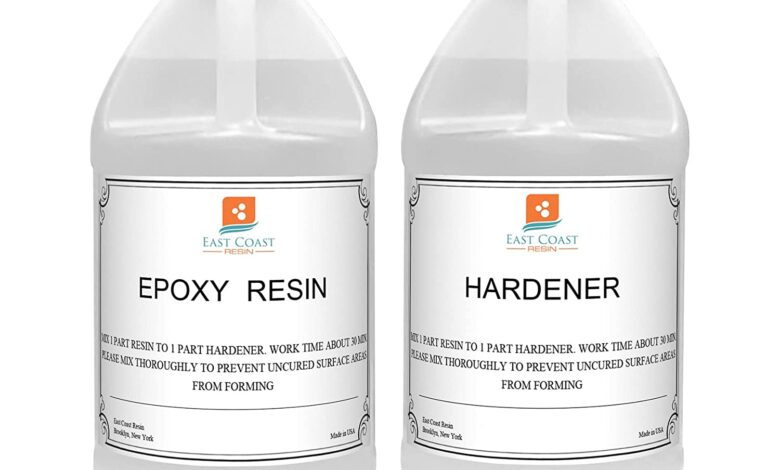
Step 7 – Mix the Epoxy
The kit includes Part A and Part B which will need to be mixed prior to applying it to the surface. The first step is to determine the amount of epoxy you require to complete your project. Find the width divided and depth in inches and then add the two numbers. For instance my vanity measures 5-feet wide with a depth of 2 feet. If you multiply these two numbers , you’ll end up with an area of 10 square feet. For a total of the area of 10 sq feet you’ll require half a gallon (2 quarts) of epoxy (that’s mixed with).
Mixing the epoxy utilize a bucket or pail with measurement lines , so you can accurately mix 1:1 ratio. The first step is to pour 1 one-quarter cup from part B to a bucket, and after that, 1 quart of Part A. I generally put Part A outside in the sun for a while to warm it before mixing. Part A is much more efficient in warm. Use an allway helix paint mixer for mixing the epoxy. To get the best outcomes, you’ll need mixing it at minimum 5 minutes.
The epoxy color is transparent by itself Therefore, in order to create a white base, mix 2 teaspoons white gelcoat paint to the bucket. Make sure that everything is mixed thoroughly before placing it on the vanity.
Step 8 – Spread Epoxy Over the Vanity Top
Pour the epoxy on your countertop, spreading it out using the help of a patty knife or the chop brush. Allow the epoxy to run down the edges and make use of a chopbrush to distribute it evenly over the edges.
Step 9 – Draw Black Random Lines Across Epoxy
After the white-colored epoxy has been evenly distributed, it’s time to add color. You can create this as imaginative as you like and choose any color you’d like. However, to simplify the process I simply employed black spray paint and added a small lines that create the illusion of marble. The first step is to take black spray paint, and then spray an amount of it onto the edge of the mixing stick. In essence, you’ll use this tool as pencil to draw on epoxy. If you’d like the lines to be darker, spray some black paint on the point. Draw lines randomly using this mixing stick over epoxy.
Take an electric hair dryer and blow out the black lines using hot air. As the epoxy warms, it becomes more flexible and runnier and the air expands the epoxy. This means that the straight lines you traced with mixing sticks can be moved or curled using the help of a blow dryer. It is possible to blow air in any direction , making it whatever you want to make.
Step 10 – Take out Bobbles by using a Torch
If you apply epoxy to the top of your vanity it will cause bubbles to develop during the process. To remove these bubbles, you’ll need the propane torch and rapidly traverse the top while making sure that the flame is around 8” away from the to the vanity. The flame heats up the epoxy and makes the bobbles appear to pop. If you see bobbles, run it through again. Don’t overdo it with the torch as it can result in a yellowish tint. it.
Step 11 – Scrape off Dripping Epoxy at the Edge
The last stage is to clean away any epoxy that is dripping at the edges of your vanity. In the time of curing it is necessary to do this every half hour on the backsplash and vanity until the epoxy doesn’t drip any more. However, if you didn’t scrape away the drips of epoxy and you want to remove droplets by using an orbital sanders the next day after it has is cured. Allow the epoxy to dry for 72 hours prior to installing the faucet or fixing the backsplash.
Step 12 – Install the backsplash and faucets.
When you are installing the backsplash you must ensure that you’re using a water-proof sealant. I taped the vanity and backsplash to ensure that I don’t create an mess from the sealant. After the backsplash is put in place, you can remove the tape. The bathroom is now complete. vanity by making your own epoxy resin.